Install SQL Server 2017 on Windows Server Step
by Step Guide with images
Mysql Server is one of the most popular servers in the corporate world. It has many inbuilt features and security options to configure, but it’s more famous due to the Enterprise Support it provides. In this tutorial, we will learn how to install SQL Server 2017 on the windows machine or Server. We are going to install SQL Server Express Edition, as this is free to use. We can use SQL Server Management Studio to make changes on the database server, it’s a free GUI based tool to manage Database. Though if you want you can use the CMD as well. Now without wasting more time, let’s begin with the installation of Microsoft SQL Server 2017.
Microsoft SQL Server Hardware Requirement:
Before we begin with the installation, we need to understand the hardware requirements for the SQL server 2017.
Windows 10, Windows 8, Windows 8.1, Windows Server 2012, Windows Server 2012 R2, Windows Server 2016
Processor
- Intel-compatible processor with a minimum speed of 1 GHz or a faster processor
RAM
- Minimum 512MB
Hard Disk Space
- 4.2 GB of Disk Space
Limitations: Microsoft SQL Server Express supports 1 physical processor, 1 GB memory, and 10 GB storage
Now follow these instructions to Download Microsoft SQL Server 2017 on windows server or machine.
- Visit Microsoft ‘s official downloading Page Microsoft SQL Server 2017 Download
- Download the setup for windows 64 bit.
- Now run the setup with administrative rights. Right-click on the setup and select “Run as Admin”.
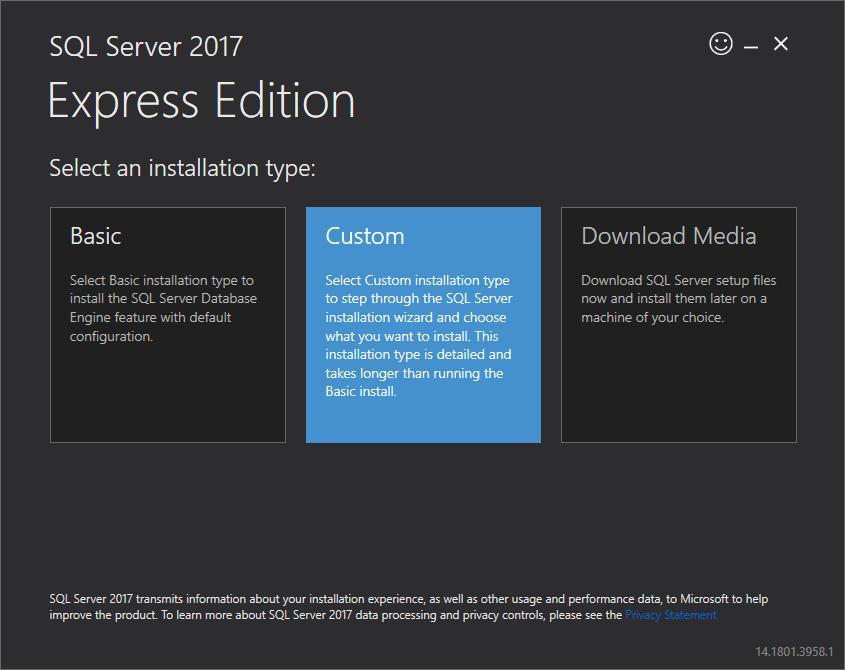
- We can select multiple options available in the console.
- If you select Basic installation then we won’t be able to make changes into the system. The setup will install everything with the default values.
- We will select the “Custom Installation” option from the setup.
- Select the directory where you want to install the SQL Server. If you don’t want then leave the default directory name and click on the “Install ” button.
- Setup will start downloading the required packages for SQL Server. After the installation is complete, we will get the option to select different packages from the list.
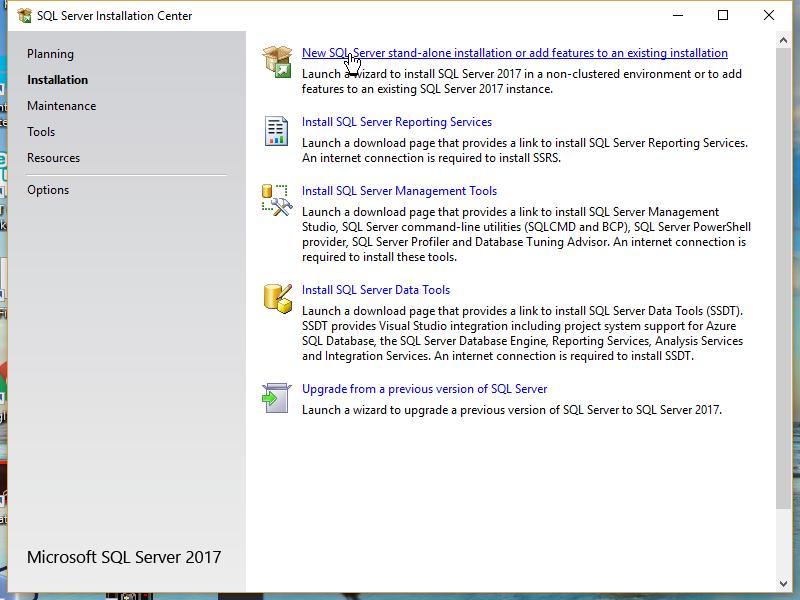
- Select the New SQL Server stand-alone from the list.
- Once the setup is complete click on the Next button.’
- Accept Microsoft ‘s License Terms and click on the “Next ” button.
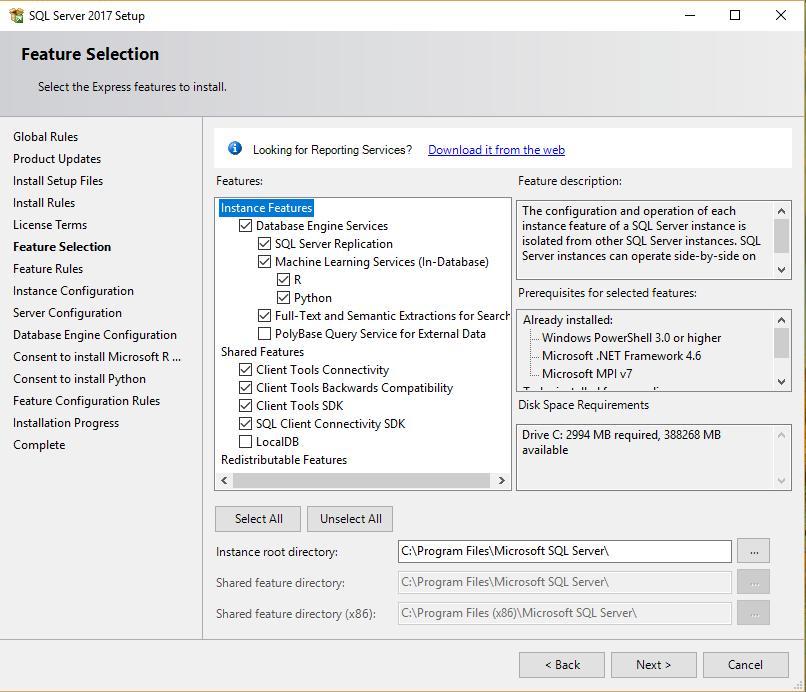
- On the Feature Select Screen, you can select the additional packages you want to install in the system. For Example – Polybase Selection Query and Python. Click on the “Next” button if you don’t want to install additional features or packages.
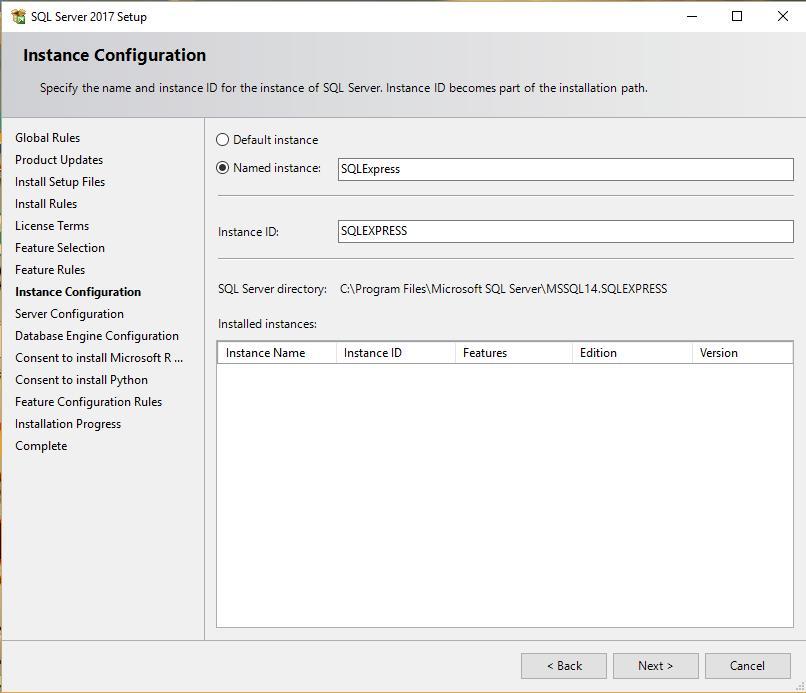
- On the Instance Configuration screen, you can add a custom instance name. By default SQL Server uses the SQLEXPRESS instance name and Instance ID. We are selecting the default name for the instance name and ID.
- On the Server Configuration screen, don’t make any change and click on the “Next” button.
- Now on the Database Engine Configuration screen. Select the “Mixed ” mode and add the SQL server User password, as we are going to use both Mysql User credentials and System Credentials as well.
- Click on the Next button, we will get Summary of all the installation process.
- Once the installation is complete click on the Close button. Microsoft SQL Server 2017 installation is complete.
Now after the complete installation of the SQL server. The next task is to manage the Database, we will download and install the SQL server management studio. It’s a free GUI based tool to create, delete a database, or create a backup of the existing.
- Visit Microsoft ‘s official downloading page by using this link Microsoft SQL Server Management Studio Downloading Link.
- The above link will download the latest version of SQL Server Management Studio( SSMS)
- Right-click on the setup and “Run As Administrator”.
- Click on the Next button.
- After the installation, restart the application and your SQL Server Management Studio is ready to use.
- Now select the instance from the SQL server list and connect using SQL User credentials
Now you can manage the SQL server without any issue. The Process of installing SQL server 2019 on windows the same as above. Let us know if you faced any issues.