How to Add more RAM to Minecraft Server Launcher Client-Side in 2020?
This guide will give you all the information on how to change RAM on different Minecraft launchers available.
My Client-side is crashing. What should I do?
If your Minecraft Launcher ‘s client is crashing on every time you click on it, then this is the right article for you. After the official release of Minecraft in 2011 a lot of Launchers came into existence. The recent Minecraft version 2.x + Packs requires more than 6 GB of RAM. If your client-side is crashing frequently then this is because of less memory resources available for it. Though adding more memory to the Launcher is quite easy. We can add more RAM in just a few steps as long as your machine has memory slots available.
Please keep in mind that Launchers can change over time, we will try to keep this guide updated, but these instructions or steps may vary with time and new additions. If you get any issue feel free to contact our team. We will help you to fix your errors. Now without wasting any time lets begin with the Instructions.
How to Allocate More RAM to a Minecraft Server without any Launcher on Windows Machine.
- Locate the Minecraft Installation directory or search for Minecraft server directory.
- Open any text editor Notepad, Notepad ++
- Copy the following text and paste it in the notepad(Without the Quotes) . “java -Xmx####M -Xms####M-exe Minecraft_Server.exe -o true PAUSE “
- Now save the file as Minecraft_launcher.bat in the same directory.
- Replace the # with the amount of RAM you want to allocate to the server in MB. Remember 1GB = 1024 MB, so if you want to allocate 4 GB of RAM # value after x will be 4096.
Adding More RAM to the Minecraft Default Launcher.
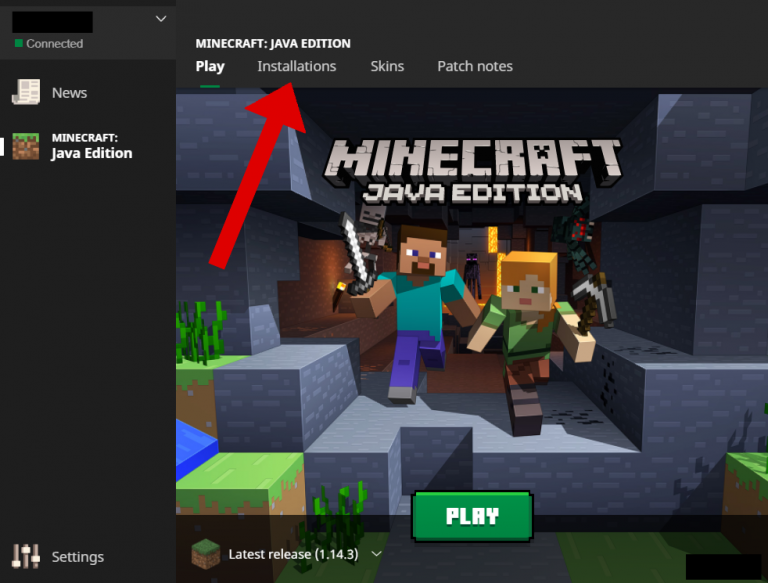
- Open the Minecraft Client Launcher.
- On the top of the launcher select the Installations tab from the main menu.
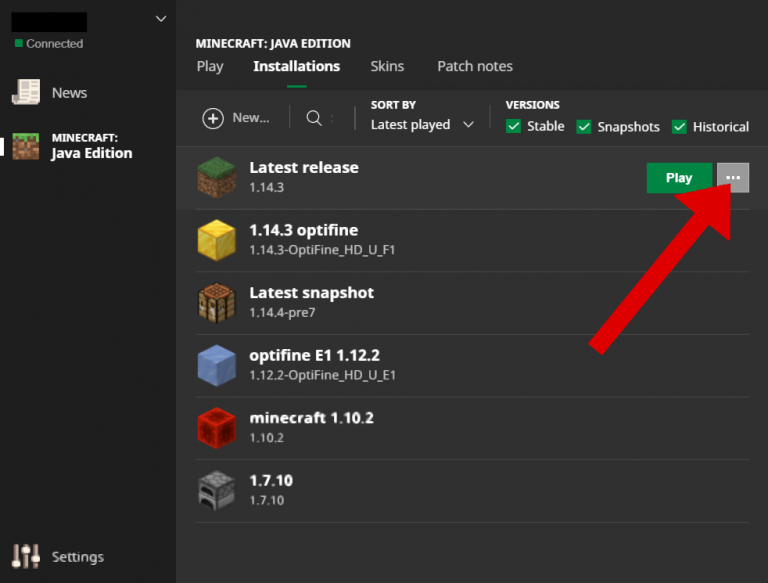
- Select the Desired Minecraft version and select the three dots option, next to the Play button.
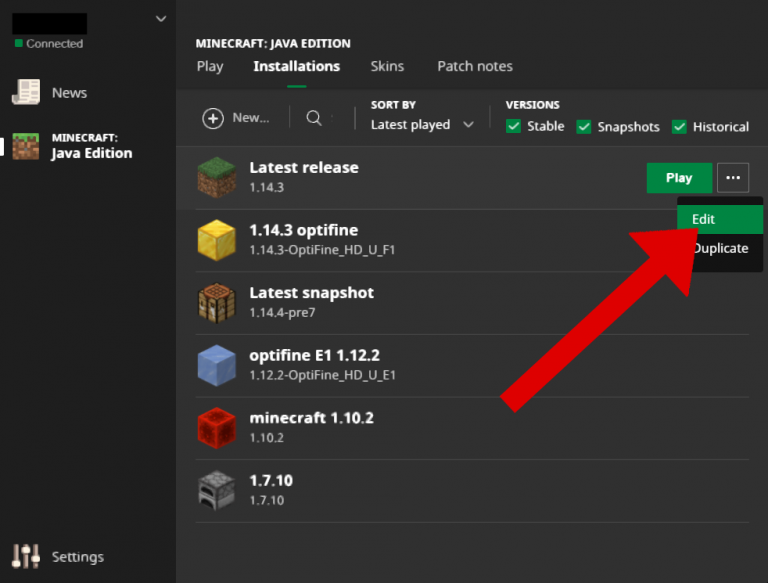
- Click on the Edit option from the drop drop.
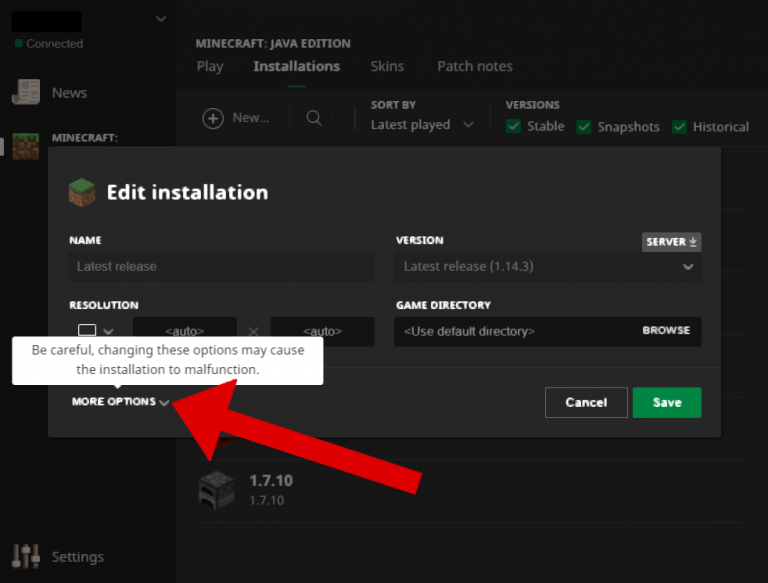
- Now click on the More option at the bottom of the screen.
- In the “JVM Arguments ” field change the value of ” -Xmx1G ” to -Xmx#G (change the value of the # to the desired RAM you want to allocate. For Example, if you want to allocate 4 GB of RAM then your updated value should be “-Xmx4G “. Remember don’t update any other parameter
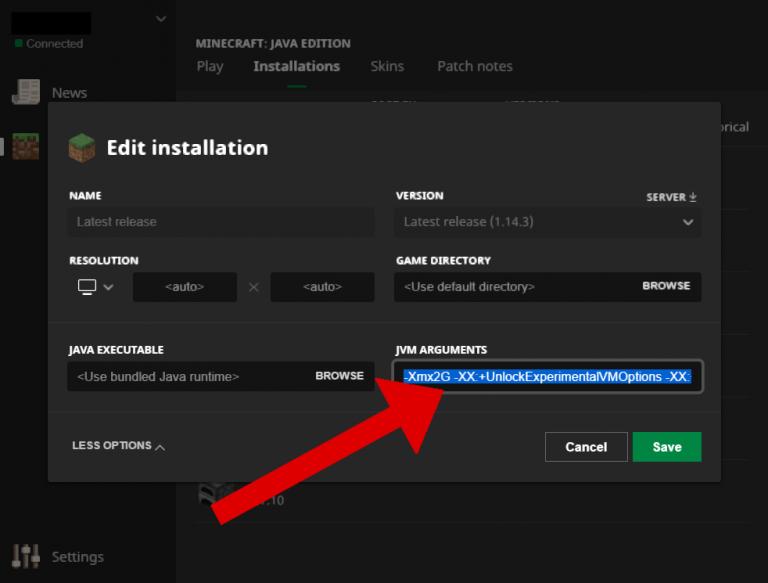
- Click on the “Save ” button and you are done.
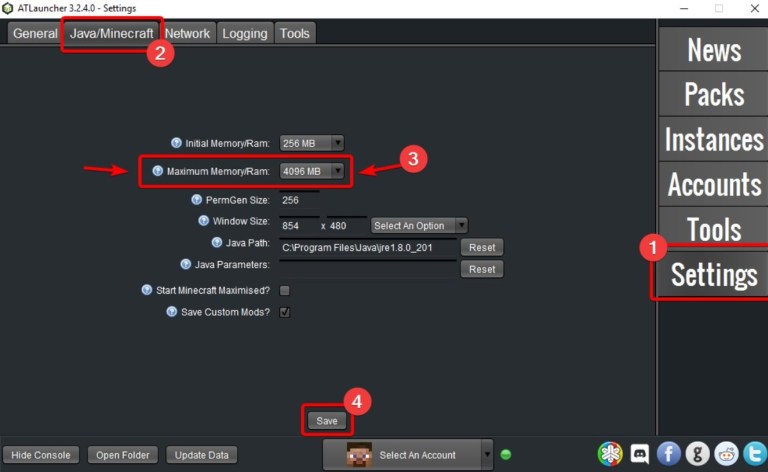
Allocate More RAM with the ATLauncher
- Open your ATLauncher.
- Click on Settings tab and select Java/ Minecraft tab from the Navigation bar.
- You will see the Maximum Memory Allocated option.
- Adjust the value according to your needs. Remember at least 4 GB of RAM is recommended.
- Click on the Save button and you are done. The RAM update using ATLauncher is quite easy.
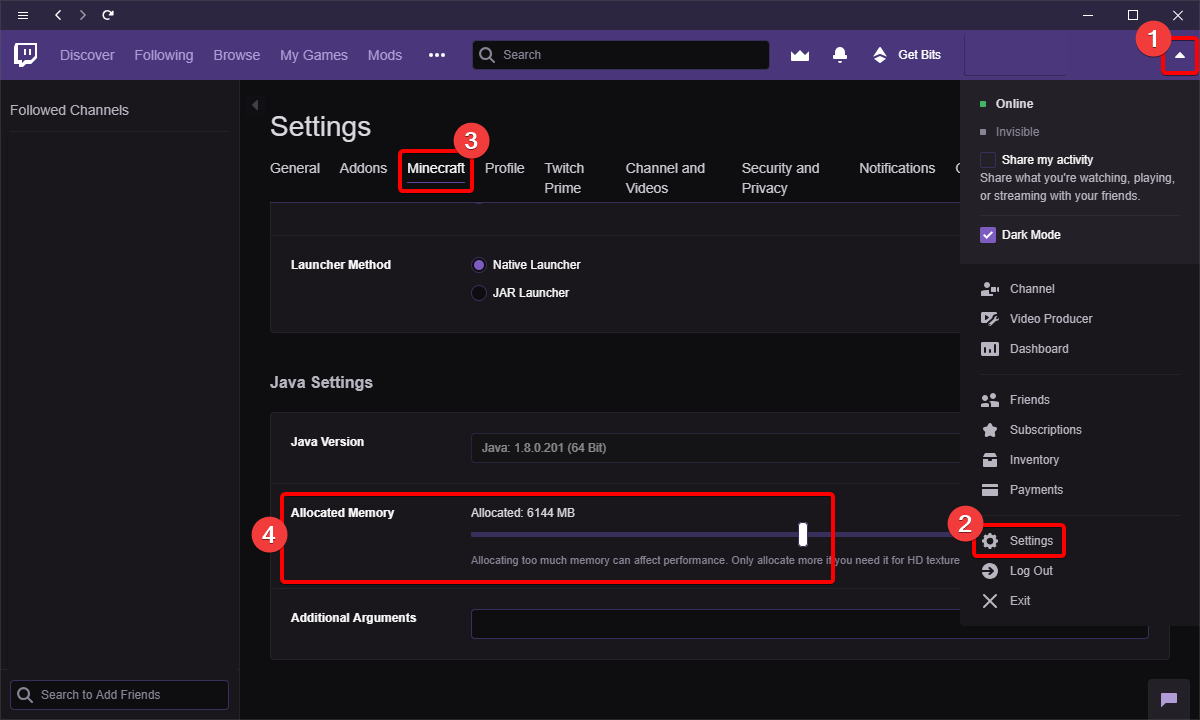
Allocating RAM using the Twitch Launcher
- Open the Twitch Desktop Launcher app.
- Click on Settings Tab and then select the Minecraft option from settings navigation bar.
- Update the RAM allocation value with the Slider and it’s done via Twitch Launcher.
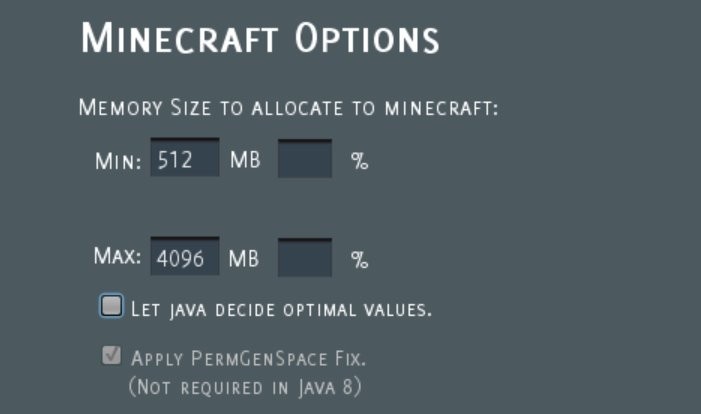
Allocating more RAM on the Minecraft Server with VoidLauncher
- Open the Launcher and click on options.
- Find Minecraft Options and click on Memory options.
- Update the RAM and it’s done.
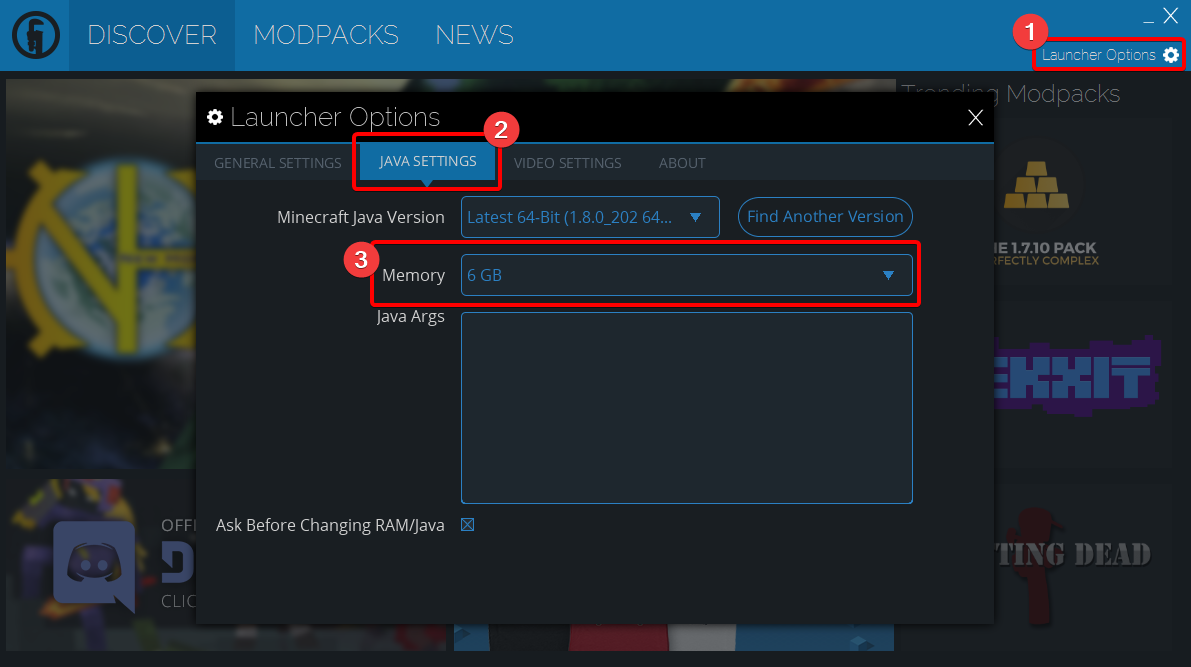
Allocating RAM with the Technic Launcher
- Open the Launcher and select Launcher Settings.
- Click on the Java Settings.
- Add more RAM from the Dropdown option. Your changes will be automatically saved.
Allocation more RAM to the Minecraft Server with Legacy FeedTheBeast (FTB) Launcher
- open the Launcher and Select Options.
- Move the slider according to the desired value.
We have covered most of the techniques in this guide. If you find any other method or have any issue following this guide. Then please let us know in the comments section. We will try to help you out.